How to Make a Rag Quilt
How to Make a Rag Quilt and Choose the Best Scissors for the Job
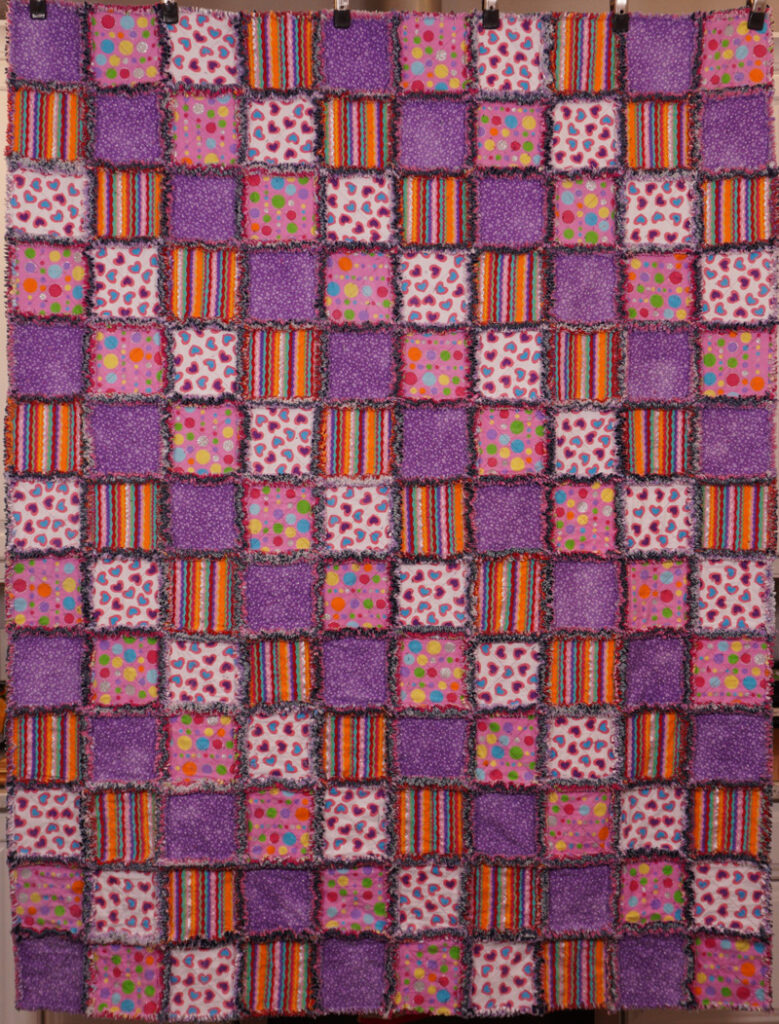
A rag quilt is a great project if you would like to make an easy quilt that eliminates some of the steps necessary when making a traditional quilt. I love making rag quilts for new babies because they are soft and cuddly when made with flannel fabrics. Also, I love to add a personal touch with a machine embroidered square included on the quilt’s back. I include birth and name information for the new baby. Rag quilts are not limited to babies. I have also made rag quilts for adults, including my daughter, grandson, and mother-in-law. They each enjoy the weight and softness of the quilt in the winter.
Tools Needed for a Rag Quilt

The basic tools you need for a rag quilt include things such as a cutting mat, a rotary cutter, rulers, binder clips, walking foot, and yardage for the blocks that you will be making.
If you are interested in a demonstration of the process from the beginning to the end, check out the video. We use several flannel prints and a denim print that we used on the quilt blocks’ backside. In addition to the denim on the backside of the quilt, we used two layers of flannel. That gave us a nice, ragged edge on each block that allowed us to create a soft frayed rag type design.
Determine the Rag Quilt Layout and Size
I like to draw a simple design on a piece of graph paper to determine the quilt layout. This process feeds my creativity and gives me a chance to change things before I start stitching.
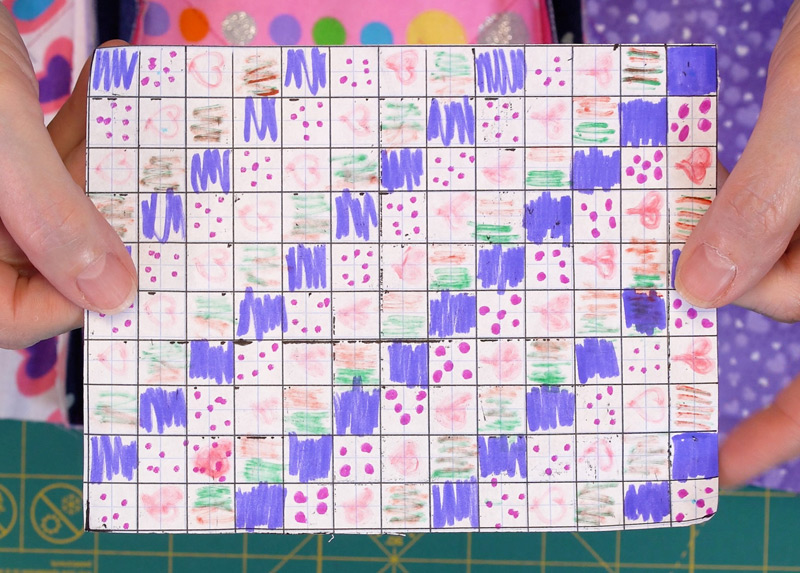
This design phase is also the time to determine the size of your quilt. I like to use 7-inch blocks to make a baby quilt. My quilt included ten blocks across and 13 rows.
Fabric Cutting
I start by cutting flannel yardage into squares. I find that 7-inch squares allow me to use several coordinating flannel fabrics. You can make the blocks the size that best fits your creativity. I assure the material that will be on the back of the rag quilt is right side down, and then I add a piece of flannel for the middle and another piece of flannel for the top. It is helpful when I am doing this to keep in mind that I will clip the edge so that it frays to create that soft edge. I like to use a bright color in the middle layer and coordinates with the top but contrasts with the other two layers.
Individual Rag Quilt Block Construction
I stitch a diagonal line across the blocks and another line that creates a crisscross that stabilizes everything so the layers stay together as I am sewing. The stitching is essential because I am working with six thick layers when I am sewing two three-layer blocks. This step holds everything in place.
When I stitch these stabilizing rows of stitching, I increase my stitch length to 3.0 so that the stabilizing crisscross stitching will look a little more decorative. I also use a walking foot on my sewing machine to help the layers move through the sewing machine at the same rate so that everything will stay aligned and flat. There is no need to backstitch when stabilizing stitching because the stitching ends will be in the seam allowances.
Rag Quilt Construction
In the next step, I attach the blocks in rows. In a traditional quilt, I use ¼-inch seam allowances and press them to the quilt’s backside. When I make a rag quilt, I increase the seam allowance to 1/2-inch, and the seam allowance is faced to the top of the rag quilt so that I can snip the seam allowances to create the soft rag look in the final quilt. When stitching the blocks into rows, I recommend backstitching at the beginning and end of each seam to secure everything. Backstitching gives a little more security to the seams.
I also recommend using binder clips to hold the blocks together to stabilize the many layers. We find that straight pins did not easily go through all the layers. I laid the seam allowance open on both sides, match the seams, and put a binder clip on each side. I demonstrate this in the video. The process is sew the row together, removing the binder clips as I come to them during the blocks’ stitching. I also backstitch when sewing over seam allowances where they match because there are many thicknesses, and I want everything to be secured. We continue to connect the blocks to complete the quilt. Finally, stitch a securing stitch one-half inch from the rag quilt’s outer edges around the outer edges of your rag quilt.
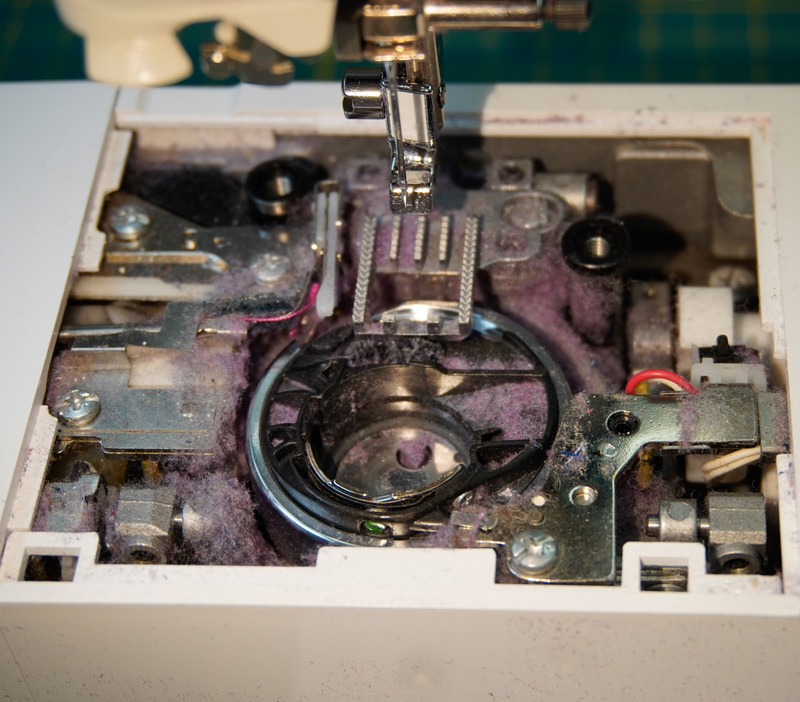
Remember to give your sewing machine a cleaning after each rag quilt. This is a picture of my sewing machine after completing one throw-sized rag quilt. I removed the lint using an attachment on my vacuum cleaner.
Choose a Clipping Scissor
Before we talk about the clipping step, I want to talk a little bit about the scissors. Scissors are essential because you will be clipping every seam allowance throughout the quilt, and the clips will be between 1/8 and ¼ inches apart. That is a lot of clipping. The best scissor will be sharp and will have a spring to open the scissor with each cut automatically.
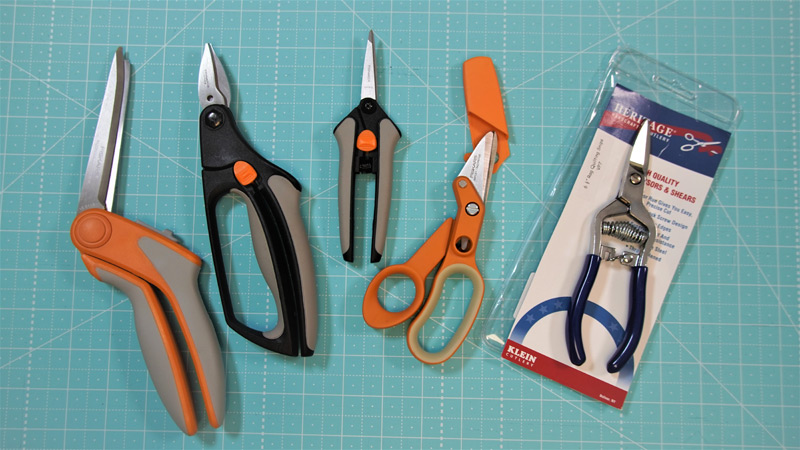
We have tested each of the scissors pictured. The larger, black-handled scissors were adequate for the first five rag quilts I made in the last several years. I found that the blades on the remaining Fiskar scissors pictured were not strong enough or sharp enough to clip through all the layers of a typical rag quilt. The most recent rag quilt had a layer of denim and two layers of flannel. Remember that you will be cutting through six to twelve layers of thick fabric.
I found that none of the Fiskar scissors was the tool for the job. Therefore, I began researching scissors and looking at customer reviews on Amazon. The scissor with the best reviews for rag quilt snipping was the Heritage 6 ½ inch Rag Quilting Snips VP7. These scissors were sharp, and the spring opened the scissors open with each clip as expected. I would recommend these to anyone that’s doing rag quilts, especially if you’re planning to make several rag quilts.
Rag Quilt Clipping
Once you have stitched your quilt together, you will need a pair of sharp scissors with a spring that automatically opens the scissors after each clip. When I construct the rag quilt, I assure that all the seam allowances’ layers are open rather than folded to one side. One of the things you will need to do is put your scissor in the corner where the seams meet and snip the seam allowance to release the stitched down areas. Once I complete the first cut, the seam allowances will stand up so I may continue snipping. Be careful not to snip through your stitching line.
A good pair of scissors will have a short blade so you can easily clip close to the stitching line without cutting the stitching line. You will also snip the outer edge of the rag quilt on all four sides. The clipping step will take some time. I usually do this in a chair in front of the television when there’s something that I can listen to without watching because I can’t take my eyes off of the scissors when I am clipping.
Rag Quilt Washing and Drying
Once I snip all the seam allowances, I move on to the final step. This step gives you the soft frayed look of the final rag quilt. Start by putting the rag quilt in the washing machine. I always put a few towels in the washing machine with the quilt to keep the washing machine balanced during the wash cycle. A wet quilt is very heavy. Wash it once without soap. Then re-washing it with a little soap is assuring a soft ragged effect.
When removing the rag quilt from the washing machine, scoop out the lint in the washing machine tub. Then, take the rag quilt outside for a good shaking. Shaking off the excess lint reduces the lint coming out in the next step. Now, put the rag quilt in the dryer for tumbling. The drying process will cause a lot of lint to be trapped in the dryer’s lint trap. Try cleaning out the lint trap every ten minutes or so. Finally, use a lint brush to remove any remaining lint from the rag quilt.
Now you have a beautiful handmade blanket perfect for snuggling in the winter.
Stay Connected with Pink Heart Quilting
Hi! I'm Kit
A quilting enthusiast, just like you. In my spare time I like to write about things I'd wished were available to me when I was just starting out or couldn't quite figure something out.
Join Our Mailing List
We'll keep in touch every once in a while about quilting related topics and promise to respect your inbox.